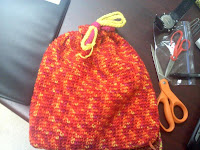
This is my first attempt at posting a tutorial... bear with me, please.
A few weeks ago I was browsing on Pinterest and I saw a really cute crocheted bag. I looked for a pattern, but I could not find one. I couldn't even find where to purchase said bag. So, after staring at the picture for a while, I decided I could just figure it out. So I did.

First, I made a
Granny Rectangle. If you've ever made a
granny square, it's the same method after you form the base rectangle. I chose to make my rectangle with a few different colors, but you can do whatever you want. I used an I-hook (which, btw, is the hardest to find hook in the universe if you happen to misplace yours mid-project) and did 15 rows, then finished with a single crochet all the way around. I didn't take any real measurments, but I think it ended up being 18" by 22".

Then, I (by I, I mean my mother. I'm not awesome at actual sewing.) made a liner for the purse. This one was made by sewing two fat quarters together and triming it down to size. Really, it doesn't matter how you get there, just as long as it is roughtly the same size and shape. The little white strings you see in the picture are tied to the center of the rectangle so I know where to position the liner.
Next, I pinned the lining to the rectangle. This was lots of fun since my needles were huge, my rectangle was stretchy, and my liner was not. Really, it only took me two tries to get it how I wanted it.
Then, I just sewed it on. This sewing was actually me. I handsewed it with a blue thread that matched everything else. I briefly thought about using the machine, but given the texture and what a pain it was to pin, it was a brief thought indeed. I used the natural line left by my crocheting as a guide. It went pretty quickly.

After I had it completely sewn on, I single crocheted around one more time. This gave me more room to work with for the next phase of the project. As you may notice, I cut my yarn after I did the last round. I'm not really sure why I did that. I don't recommend it for you. It just meant that I had to join back with the color I was just using. More ends to weave. Don't. Do. It.

Next came the decreasing to make it curl in. I did two rounds of single-crocheting 2 stitches together. In the corners, I did a ch2. There are probably easier ways I chould have done it, but this worked out pretty well. When I came to a corner that didn't allow me to decrease, I just single crocheted. That's what happens when you make your base to "look right" instead of counting your stitches. :-D
Hmm, with all the pictures I took, for some reason I did not take a picture of the edging. On each of the longer sides of the rectangle I did four rows of single crochet.

Along the shorter sides I did 10 rows of single crochet for the handle flap. As you can see, I also left a long tail for sewing it closed. My "tail" was about 5 times as long as the edge to make sure I had enough yarn. On the other side I just didn't cut it and crocheted from the skein. Both methods worked with the same effort. I only cut it off because I didn't have my handles with me and I wanted to keep working. :-)

Now the fun part... stitching the handles on. This was probably the most difficult part for me. I'll be honest, I had never sewn handles before, so that probably didn't help. Anyway, for this part I folded the flap over the handle and slip stitched all the way across. To make sure I stayed even, I lined up the first and last rows of the flap.
 |
| Tada! Then I was done! |
Overall, it was a fairly simple project. I would probably rank it as advanced because of the changes in stitching. And you could probably do it without the liner, but your stuff may fall out. After writing this, I am now thinking of making an actual pattern with "normal" crochet directions. Anyway, I hope you like it. Let me know if you have any questions!
 Isn't it pretty? I'm very excited about it. I just got it yesterday, so I haven't had a chance to really play around with it too much yet. Of course I put it on to see if/how it works. So far I'm pretty impressed with it. I'm planning to workout tonight after my shift, so I'll put it to a real test then. Is it sad how excited I am about this? I've wanted one for a while, so I splurged with my tax return.


